Hello, and welcome to my new page regarding my digital modeling class! I’ll be updating this blog page with progress of my digital modeling skills as time goes on. ________________________________________________________________________________________________
Source images:
Concrete: http://images.naldzgraphics.net/2014/07/44-white-smooth-seamless-concrete-textures.jpg
Blue Metal 2: http://freestock.ca/dark_blue_grunge_texture_sjpg3668.jpg
Red Ball: http://www.textures.com/system/gallery/photos/Metal/Scratches/115253/MetalScratches0081_2_240.jpg
Blue Roof: http://www.lacasadelastelas.es/images/stories/virtuemart/product/b-sef-t044_13.jpg
Wood: http://harvestdental.com/ModernTrailblazersNewProducts/files/assets/background/background.jpg
Window: http://charlottecalvary.org/wp-content/uploads/2015/09/grey_glow2.jpg
Wooden Grate: http://www.outworldz.com/SeamlessTextures/master/Wood/wood%20grate.bmp
Concrete Tiled Floor: https://s-media-cache-ak0.pinimg.com/736x/0d/74/be/0d74be130bab1bdcb4857be2d6fb79ee.jpg
________________________________________________________________________________________________
December 8, 2016
9:39 pm
CAGD 230 Game Assignment (Finalization UVing/Texturing & bringing into Unity):
Modeling:
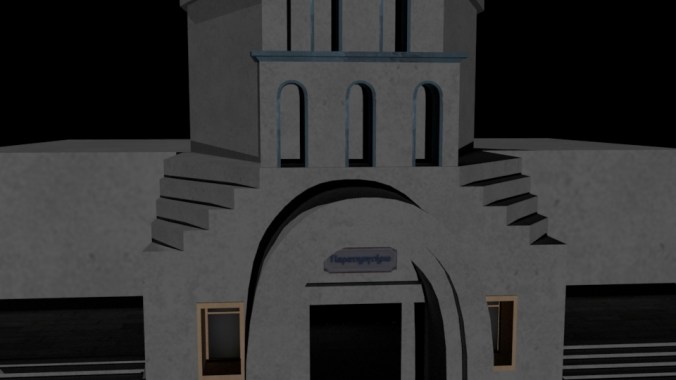
To wrap up my project, I had to finish up some delicate and intricate modeling/UVing on the back of my windmill (technically the front). I had to model and UV the blades of the windmill itself, in addition to some connecting pieces.
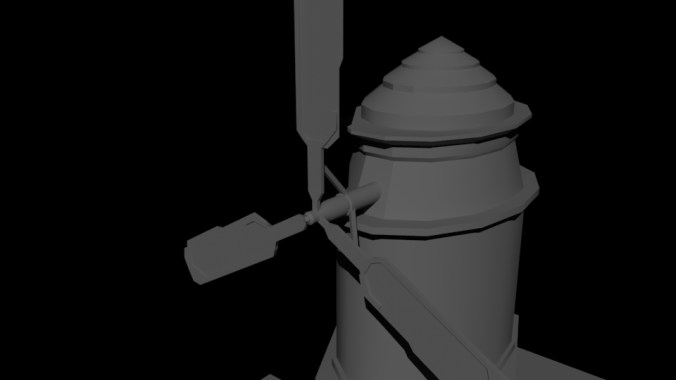
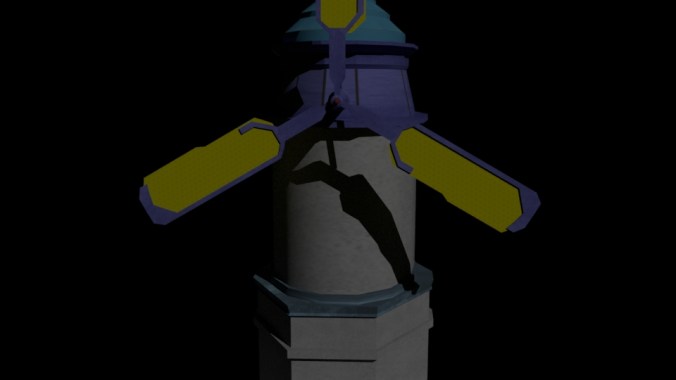
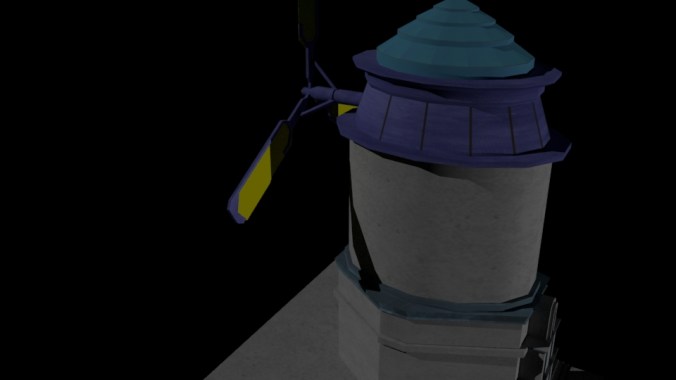
I had the most fun with this because it’s always exciting for me figuring out how I’m gonna approach the modeling process. I also had fun being limited on tri count because it made me push my skills to see what I could really accomplish given a lot of limitations (I ended up with 4,369 tris, and could’ve used those 631 extra tris to model details if I had the time). I believe that I did a good job overall with modeling my windmill, although I would’ve liked to model the back (blade-facing side) porch area (as seen below, on the left-most & right-most portion of the images, respectively) and include more details overall in my model.

My building was the most complex to model out of every building chosen by my group, but I enjoyed the challenge, and I believe I did a fairly decent job of accurately modeling/recreating it.

UVing:
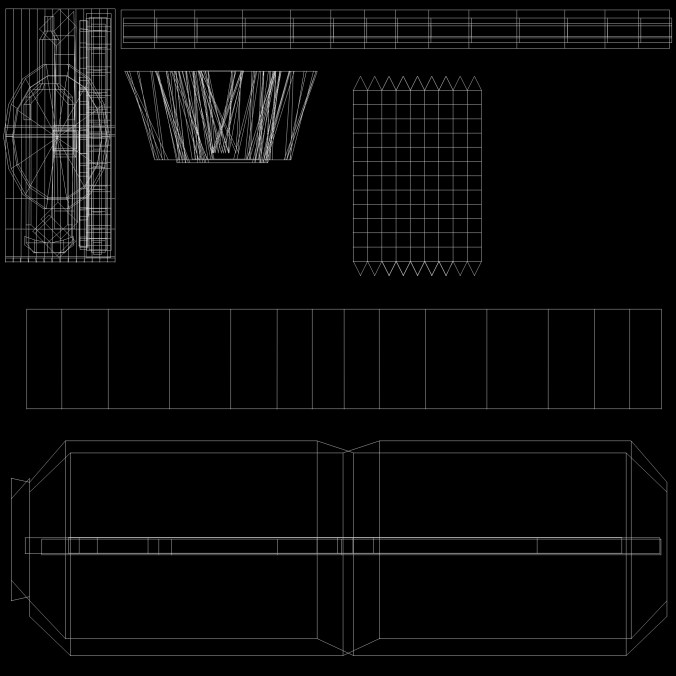
Ah, UVing, my old friend. UVing is a process that I’m beginning to understand and slowly, but fully grasp as time goes on. For most of what was left on my project, I just had to UV a couple more things and then arrange all of my UVs into 1 or 2 UV maps (I ended up creating 2). I’m still a bit slow when it comes to UVing, but I have a process that isn’t standard to the “unfolding” method I see everyone else using. For simple objects like cubes that have different textures, I’ll planar map each individual side of the object and overlay them according to what side gets which texture. For example, the following image is what my UV looked like for my midsection of the windmill, just behind the arches of the doorway that served as the support for the cylindrical shape of the windmill.
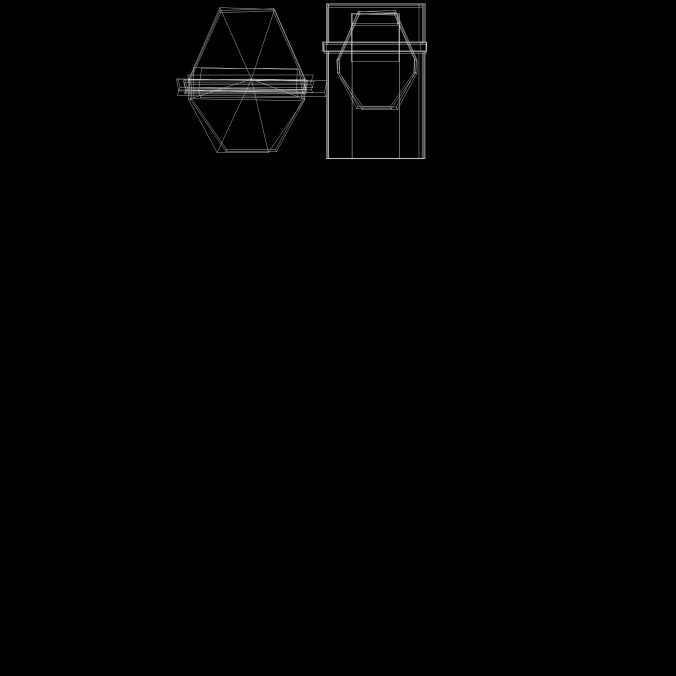
As one can see, I separated what is clearly one object into two separate parts for UVing. Why? So I could overlay and color/texture the left objects of the UV blue, while I colored/textured the right objects gray. The UVs on the left side were blue for the trim of the midsection, and the UVs on the right were gray for the rest of the object. I overlayed all of it to save space in my UV map and shrunk it down to a size where resolution wouldn’t be too much of an issue (so long as I didn’t see pixels, I was fine).
I did this with all of my objects and ended up with 2 different texture maps, one for the top portion of my windmill, and one for the bottom. The bottom texture map is found here:
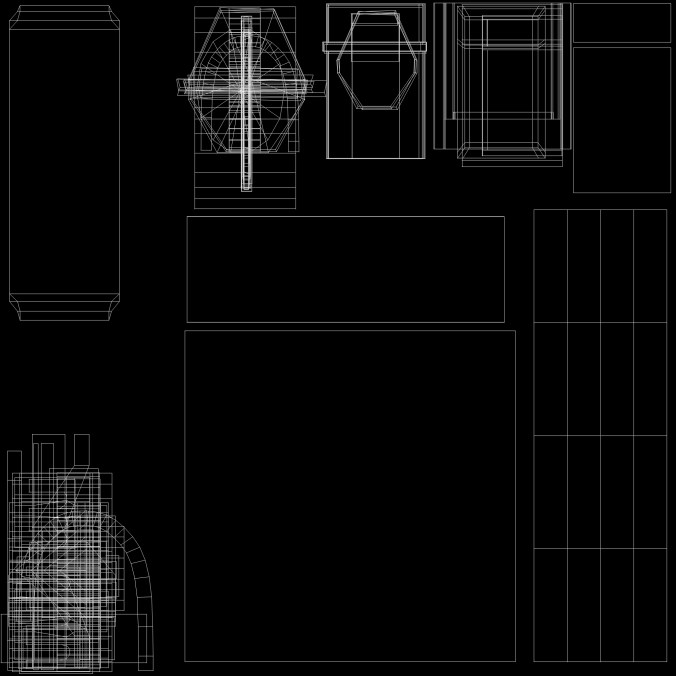
And here is the top texture map:
Texturing:
Texturing, for me, was the least fun. I still need to learn more about normal maps to try and get realistic looking textures, but it was really hard trying to grab good textures from sources off of Google. Because Overwatch is stylized, it became increasingly harder and harder to fins a texture that I wanted to match the texture in game. I struggles trying to get my textures to look a certain way, and after some adjusting, this is what my top texture map looked like after aligning with UVs:
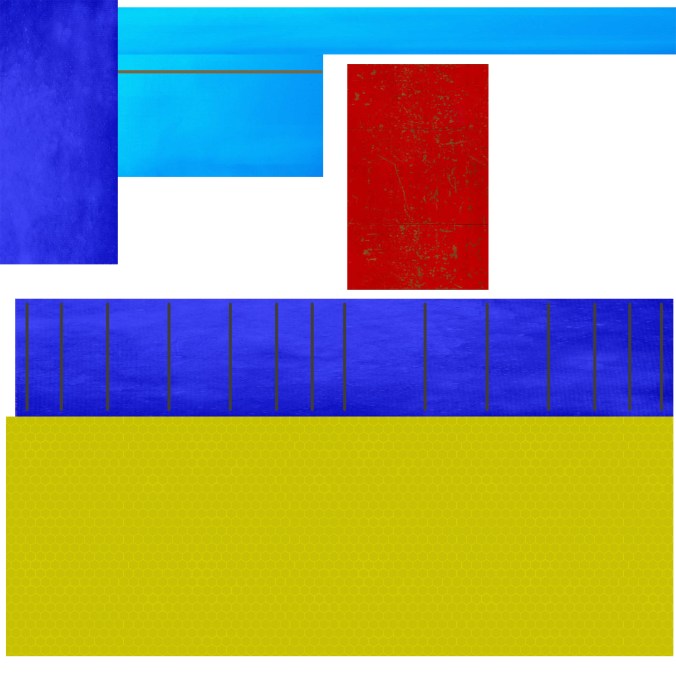
Initially, the colors were way too bright to fit in with the style, so I had to bring them all down. If I had more time, I would’ve definitely invested more into texturing. Here’s what my bottom texture map look like:

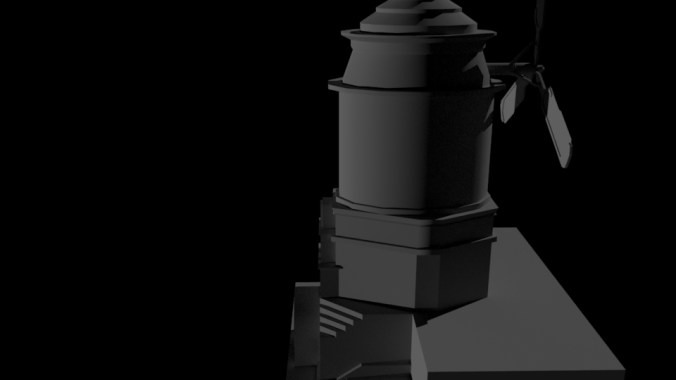
I was much more pleased with my bottom texture map, but I still wish I had more time to adjust a lot of both texture maps. Here are a few final renders, texture maps and all, but with no proper lighting:

My biggest challenge was figuring out how to do the front “staircase effect” on the corners of the base of the windmill. I also had a tough time UVing the top half of the windmill, but thankfully I tried out a method where I UV’d the object immediately after I modeled it (saving me time when it came to duplicating/rearranging my objects). This saved me tremendous amounts of time and made me feel like I was making more progress as time went on.
Overall, I had a lot of fun working on this project. I thoroughly enjoy modeling and can see this becoming the career path that I follow. In total, I worked on the project for about 26 hours. I spent about 20 hours modeling and UVing, 3 and a half hours texturing, and an extra 3 hours organizing my scene and organizing textures/UVs/making sure naming conventions were correct.
________________________________________________________________________________________________
________________________________________________________________________________________________
October 19, 2016
8:13 am
CAGD 230 Dining Scene Assignment (Texturing/Lighting/UVing)
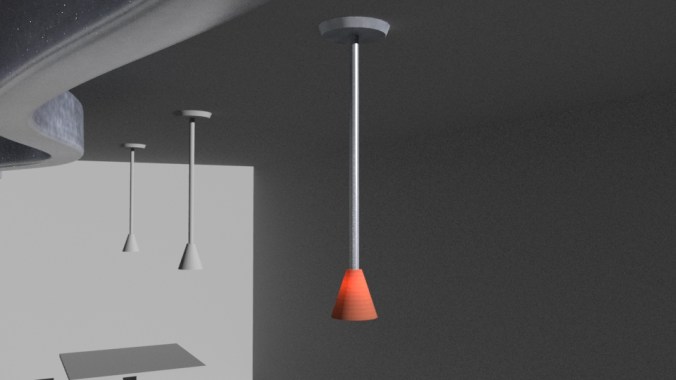
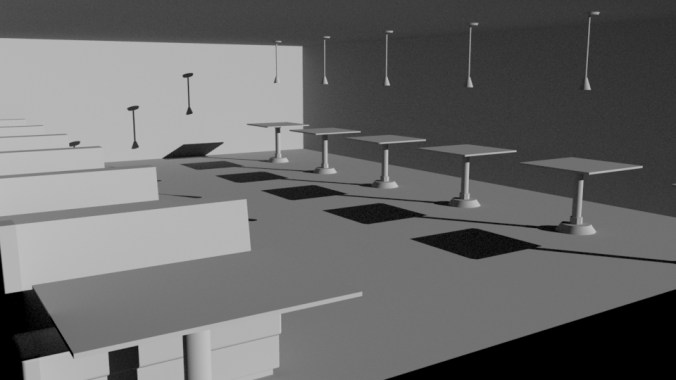
I have made a considerable amount of progress texturing and finishing up certain parts of my scene, but I still have to texture a lot of the important objects in my scene. I’m not happy with the amount of progress I’ve made, but I’m trying to make sure everything looks nice and that there aren’t any hiccups in my scene (texture seams, fixed UV’s, etc.). I actually came across a small problem while texturing my lamp, but I fixed it and now it looks seamless all the way around. In terms of progress, I’ve modeled and Uv’d ceiling ornaments and a chair for my scene, textured the ceiling ornaments and my light. I’ve done some lighting for my scene, but I need to fix the cast shadows all across the room that look as though they’re floating. I also fixed a UV issue with my lights as well. I have a lot of work to do if I’m going to have this finished by next Wednesday, but I know I can do it. 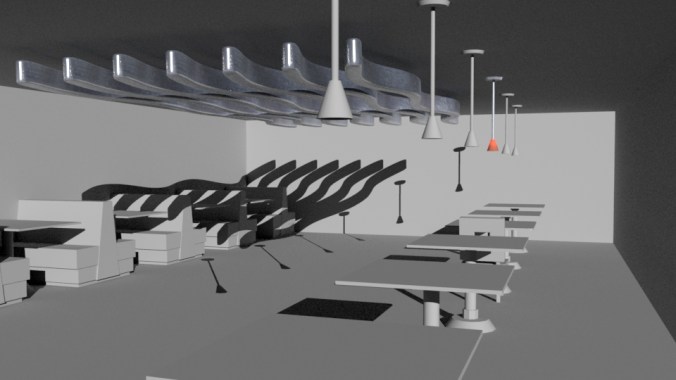

________________________________________________________________________________________________
October 12, 2016
8:21 am
CAGD 230 Dining Scene Assignment (Modeled/UV’d)
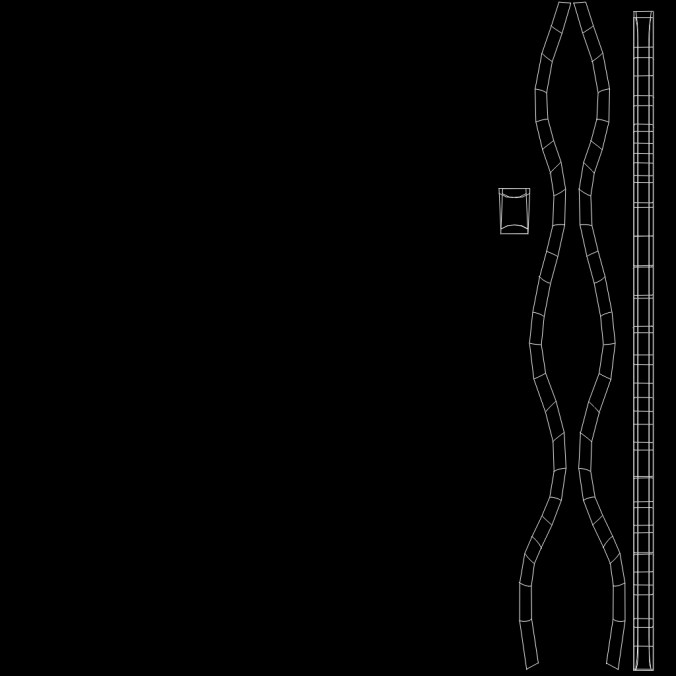
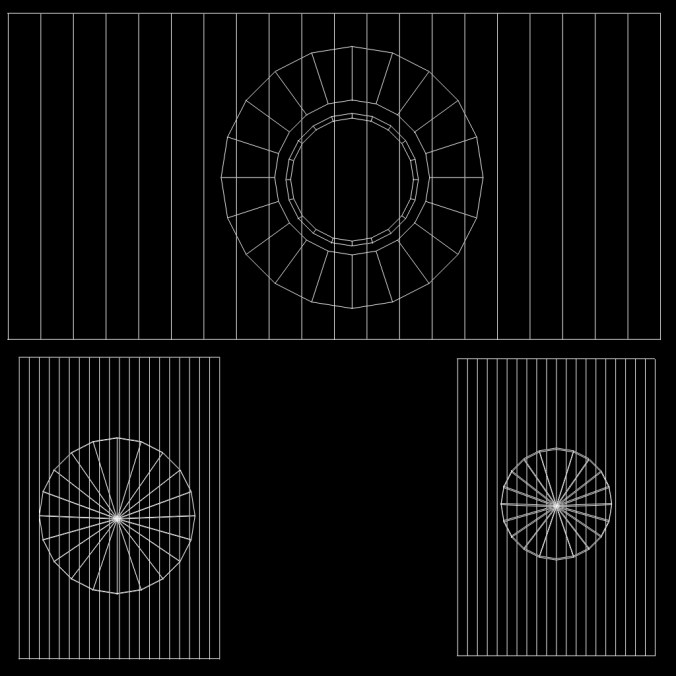
The more progress I make on this assignment, the more I realize how difficult this assignment really is. I’ve already run into a lot of problems that I didn’t account for, and it’s cost me hours of wasted time. I now realize that beveling an object makes an already stressful UVing process even more stressful. I’ve had to go back and fix my models and add edge loops to subdivide them when I press 3. This way I can still UV without the process being completely foreign and extremely difficult (as it’s already proved after failing to properly use 2-4 hours of my time). I didn’t get UVs on all of my objects and I still have to model some smaller details but I’m relatively happy with my progress so far. I’m not sure how to show my UV progress for all objects thus far so I’ve just attached a picture of my lamp’s UV.
________________________________________________________________________________________________
October 5, 2016
10:33 am
CAGD 230 Dining Scene Assignment (Blocked):
For this assignment, I’ve decided to veer away from retro diners (as cool as they are) because I feel like everyone will be doing a retro diner. I’ve decided to do a mashup of items from various different reference images to create my own unique composition. The attached reference image is how I will compose the image (but many of the items will be removed/moved around to fit the style I’m going for). I plan on having chairs, dining tables, booths, lights, ceiling ornaments/decorations, tiled floor (bump map, most likely), and potential signs/doors leading to different parts of the restaurant.


________________________________________________________________________________________________
September 28, 2016
8:24 am
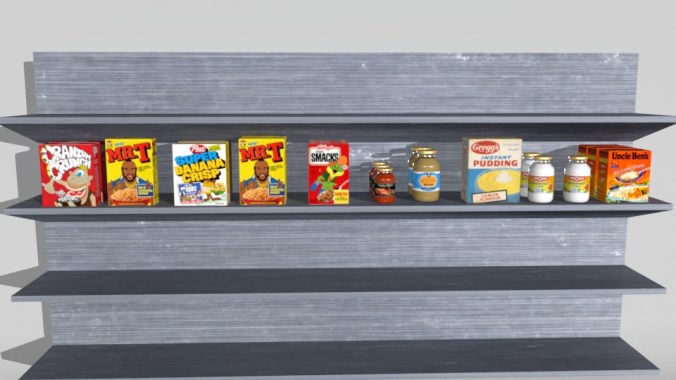
CAGD 230 Grocery Shelf Assignment:
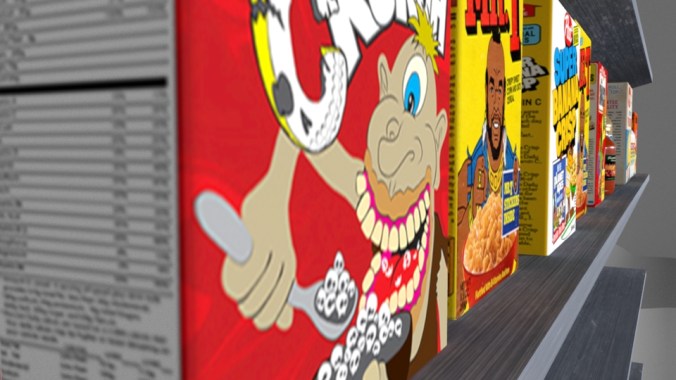
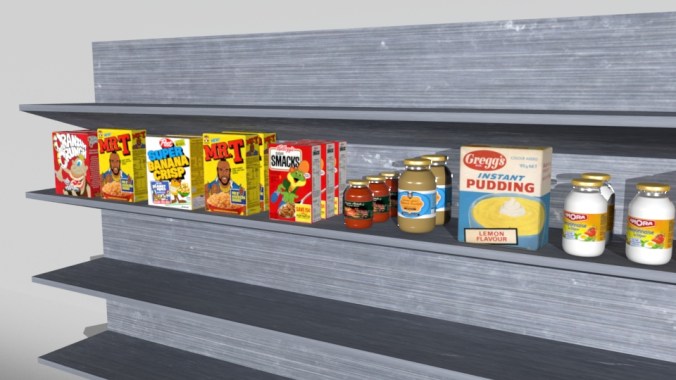
For this assignment, I had to model and UV a scene from the shelf of a grocery store. We started by modeling and UVing/texturing a pudding box. After this, we had to find at least 5 more unfolded textures of different objects, and move them around to fit within our UV in Photoshop. Next, we had to model and UV/texture a glass jar (which included the lid and the sauce texture inside of it). Finally, we had to model a grocery shelf and light our scene accordingly.
I was not expecting it to take as long as it did to find unfolded textures, so I ended up wasting a lot of time looking for a decent unfolded texture with proper angles to use on my UVs. It also took me a lot of time to properly format each box texture to the initial UVs that we had because I wanted to make sure the textures looked nice when I brought them into Maya. There were some things I also had to troubleshoot without the help of Jen (my instructor) due to minor mistakes I had made earlier in the UVing process. I enjoyed texturing a lot more this time around, as it felt good to correctly match the texture with the UV (I’m super into details like keeping both sides of the top of the box so it can fold together). In addition to all of these things, modeling is slowly becoming easier for me.
________________________________________________________________________________________________
September 19, 2016
8:45 am
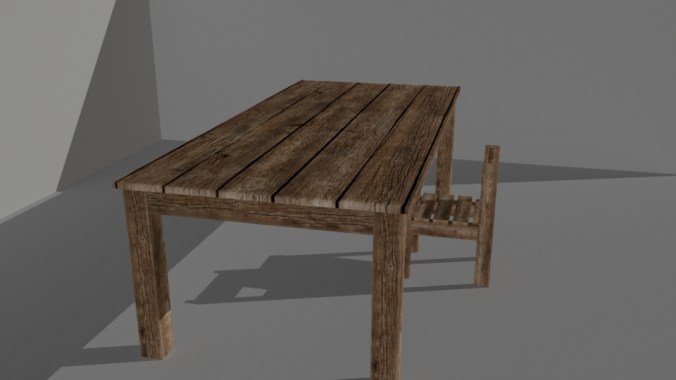
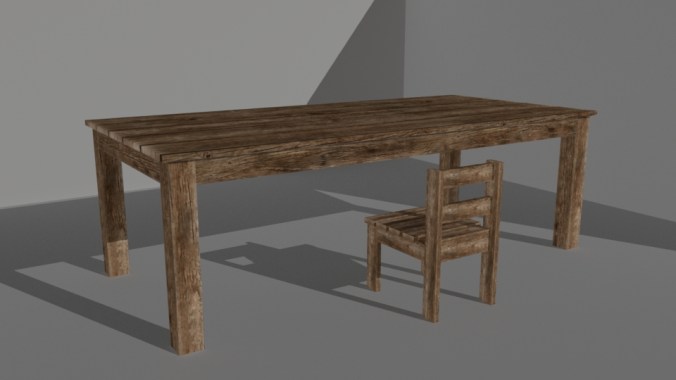
CAGD 230 Table Chair Assignment:
For this assignment, I had to follow various modeling/UV/Texturing tutorials to create a realistic looking table in Maya. Once the table was complete, I had to move on and create the chair(s) using the same guidelines, but with no tutorials to follow.
I had trouble initially while watching video 4 (the texturing tutorial) because I had no idea where my professor found the textures. After some asking between classmates and waiting, I figured out that I just needed to google “tileable wood textures” and use one of those provided. Unfortunately, after I had continued the video, I found out that the professor had said later on how to get the texture, and I despised myself for closing out the video after panicking about my lack of textures, but I digress. The toughest part about this project wasn’t modeling, or even texturing; it was UVing. Uving has become the bane of my existence (as I believe it has with almost every CAGD student ever) because of the difficulty in comprehending UVs. It’s hard to see my objects as a plane, organize them, figure out what textures are stretched, and troubleshoot any problems I encounter. However, despite the problems I’ve faced, I only think these problems have helped me clear future roadblocks and given me experience UVing so future UVing isn’t as difficult (hopefully).
________________________________________________________________________________________________
September 9, 2016:
12:50 pm
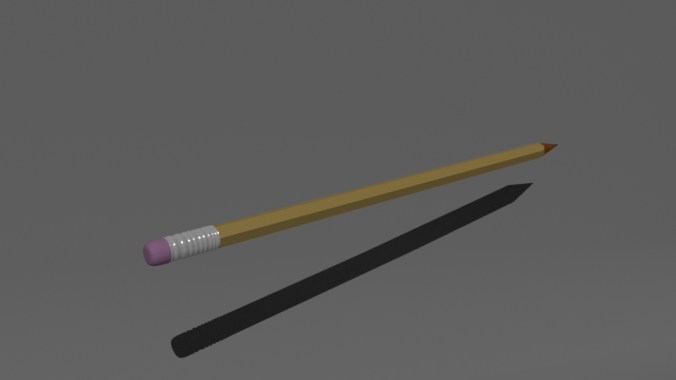
CAGD 230 Pencil Assignment:
For this assignment, we were required to model, UV, and texture a pencil, and render it. It was my first time using UV’s to apply textures to an object and it turned out to be really difficult. I didn’t have enough time to put my name on my pencil, as I neglected to give myself enough time to do the final step in the process. This assignment was harder then I anticipated, but I’m still learning and having a lot of fun modeling.

________________________________________________________________________________________________
August 30, 2016:
11:54 pm
CAGD 230 Primitives Assignment:
For my Primitives Assignment, I decided to model a pirate ship because I thought it would be a challenge for me. Despite it being a challenge, I had tons of fun working on this assignment.
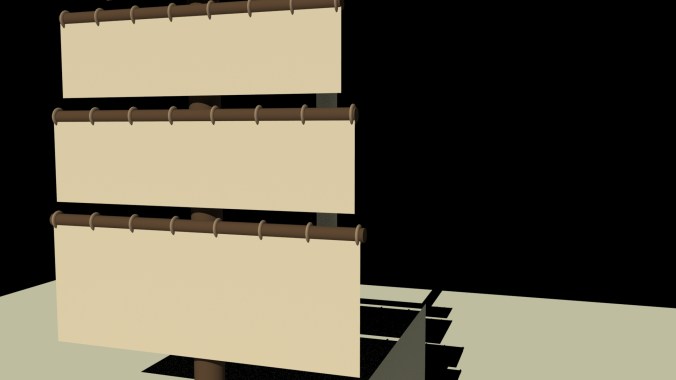
The composition of my image is a side view of the ship with some of the sail cut out of the frame in order to make a decently sized render (and so the ship would fill up more of the frame). I could’ve done a more vertical composition/size of image, but I decided for quality’s sake I would take the image as 1920×1080 pixels. I think this angle of the ship is interesting, but I struggled with composition. I tried making the back sail on the one-thirds line to maybe lead the eye down the mast and up throughout the ship, exiting out the bowsprit. I probably could’ve done a better composing the image but I like it as it is. I also did a bit of experimenting with the direct lighting in this image and decided that a sort of 3/4 angle light on the ship would make it more interesting, as the shadows define the ship and help lead the eye throughout the image.
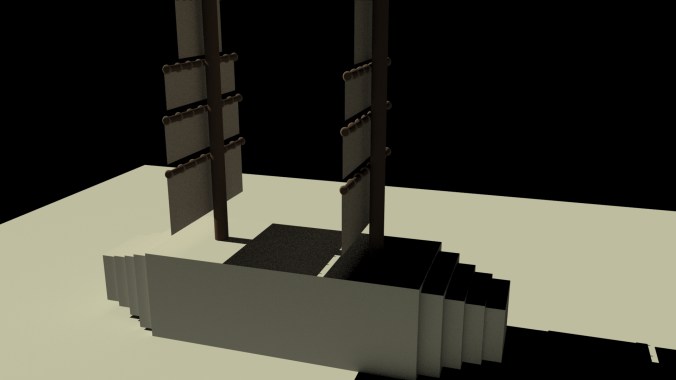
I ran into an initial design problem because the shape of an actual ship is more of a curve/bow. Because of the restrictions with face/edge/vertex selecting, I decided that I would use 5 cubes elongated within each other to give a sort of “staircase” effect to the ship and give it some shape. I struggled coming up with a different design so I decided after a lot of trial and error that this was the best-shaped ship for me. I also ran into some trouble (albeit minor and unnecessary, but still) with the texture on the water beneath the ship. I tried creating a fractal bump map, but it failed to show up whenever I rendered. I decided that it wasn’t necessary for this textured effect to be in my final render, although I would’ve like to see how it looked with the bump map texture applied to it. Despite these challenges, I’m still proud of what I’ve modeled with these restrictions!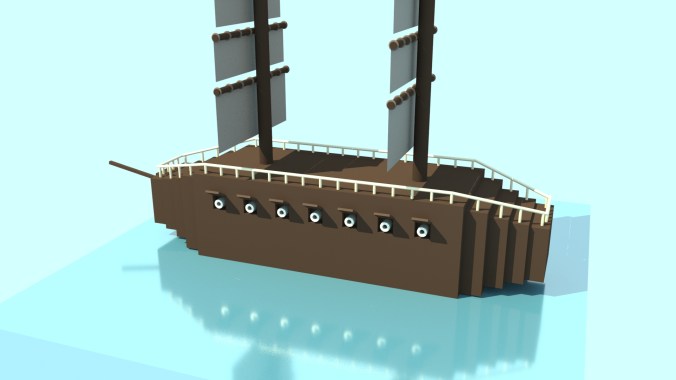
________________________________________________________________________________________________
August 28, 2016:
1:05 pm
I’ve decided I want to model a pirate ship/generic ship thing. Not too up to date on nautical terms, but I’m making progress and it’s turning out alright! I’m struggling to figure out what to do with the base of the ship because I’m limited with what I can do (i.e. I can’t select edges/vertices/faces to extrude with). I like it so far but I’ve got some progress to make.
