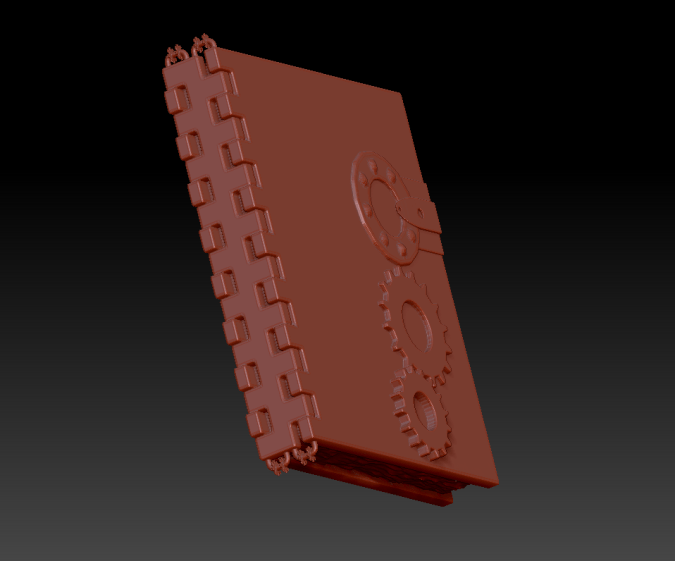
Book High Poly:
For this week’s blog post, I’ve done some pretty intricate modeling in Maya. I spent a lot of time in Maya making my book, and I ended up just doing the entirety of my low poly inside Maya, and it’s just under 5,000 polys (4,962, I think).

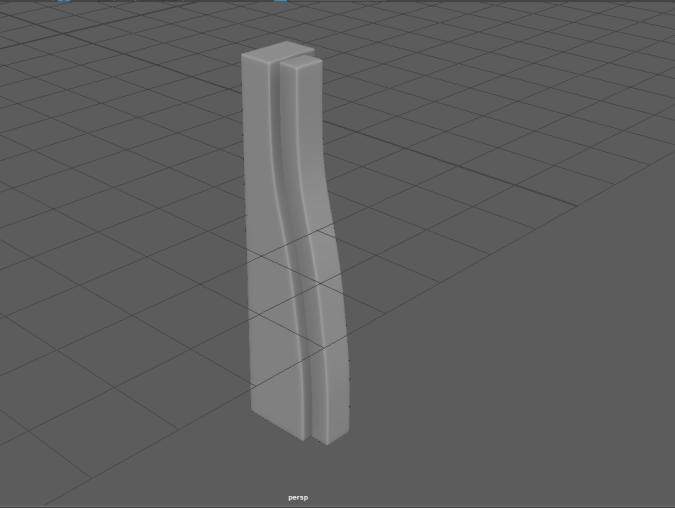
I added just a few things in Zbrush (with what time I had after making my low poly). As seen in the picture above, I added some studs to the centerpiece of the book. I also added some somewhat ruffled pages, as seen in the image below.

One of the main focuses of my book is the spine that Frank was telling me to accentuate.
In my original reference image (seen below), the spine is more modern, and actually feels like a school binder.

He liked the idea of some interlocking dwarven-steampunk mechanism that bound the two faces of the book together. He also had the idea to put some sort of pin through them which keeps them together (the little gear-pipes on the ends). Logically, this sort of method doesn’t lock the book, but it does constrain it from opening all the way. My idea is to take the middle cylinder between the two gears and make it a transparent gaseous-esque substance inside of Painter. I plan on giving it some emissive and hoping it’ll add some magic-future-cyberpunk vibe to my book.
Book Concept:
For this week’s blog, I’ve done some research on some different books I can model. I like this book cover, but it’s just something to get me started.
I like the way 2d lines give it a 3d perspective. But it got me thinking of narrowing down my search, so i moved onto steampunk books, and that’s where I found a goldmine of ideas.
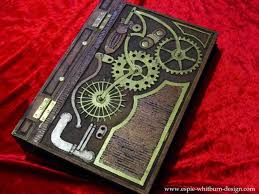
I’m thinking about incorporating some gear-mesh type thing in my book, like these two images. I also like the intricate designs of the next two books:

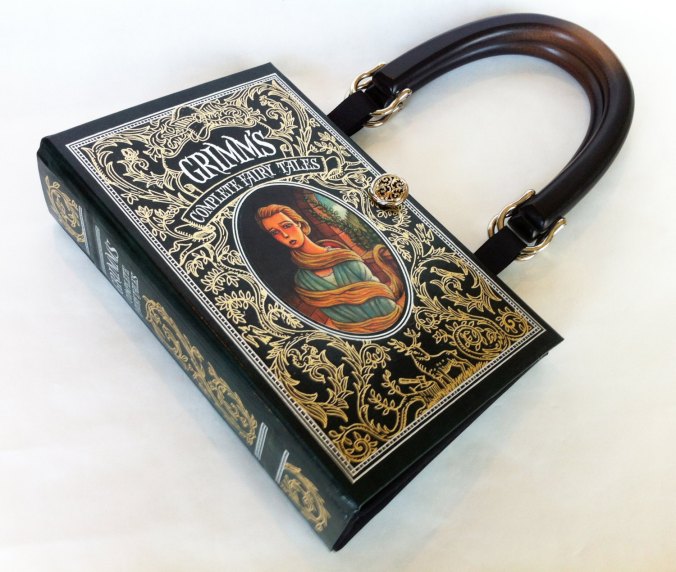 These two books have a nice intricate design that I would want to incorporate with some cogs and gears. The last book is just a reference for some intricate design-work I could do to intensify the workload.
Blog Post Week 4:
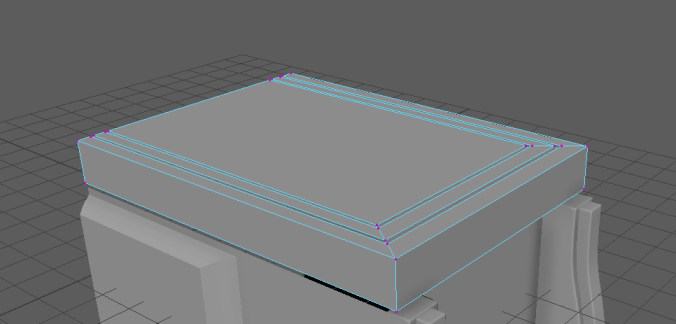
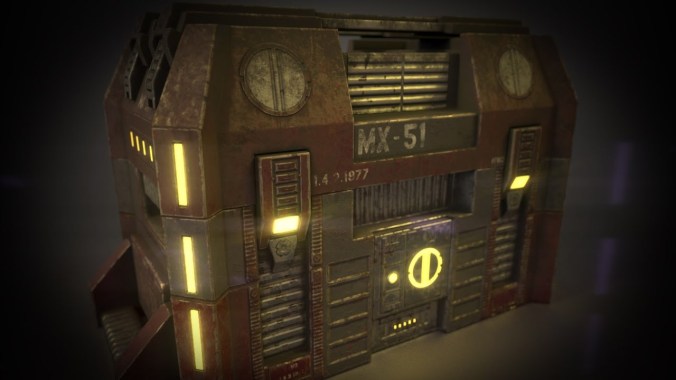
These past few weeks have been filled with lots of crunching. I’m happy with how my final model turned out, but I still think I could use some work on my UV’s. I finished my high poly crate and I’m happy with how it turned out: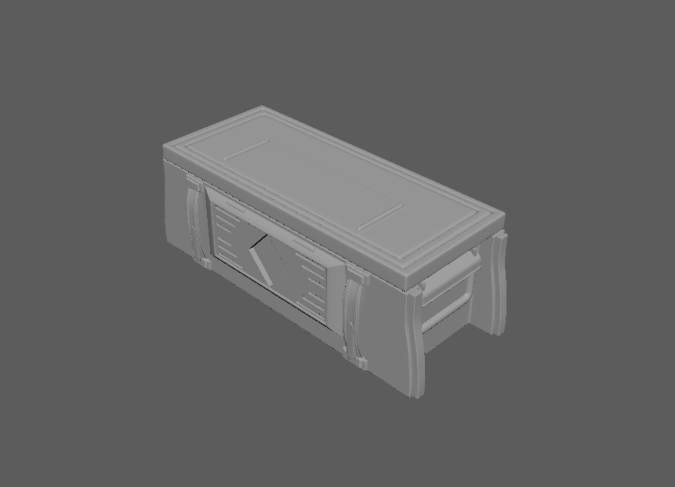
After finishing my high poly, I went in with the quad draw and drew my crate out. I went back in after drawing them out to clean up some of my geometry, but I managed to make my crate just barely 2,000 quads, so it’s really low res, which I’m proud of:
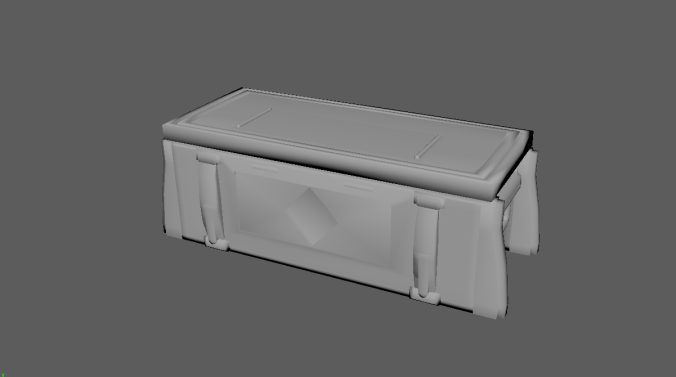
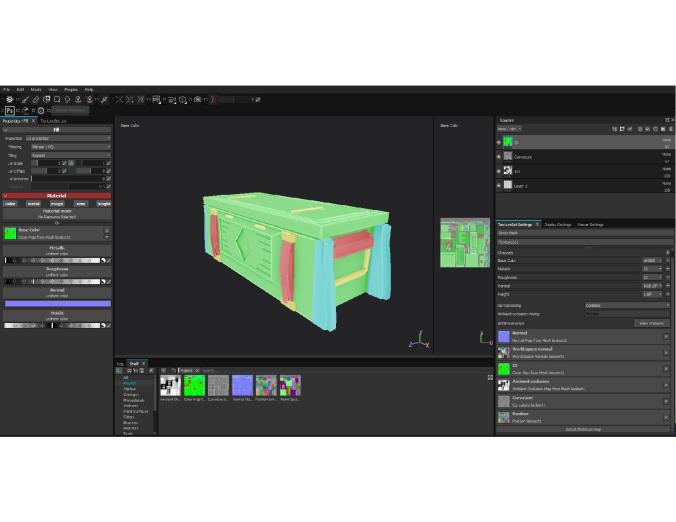
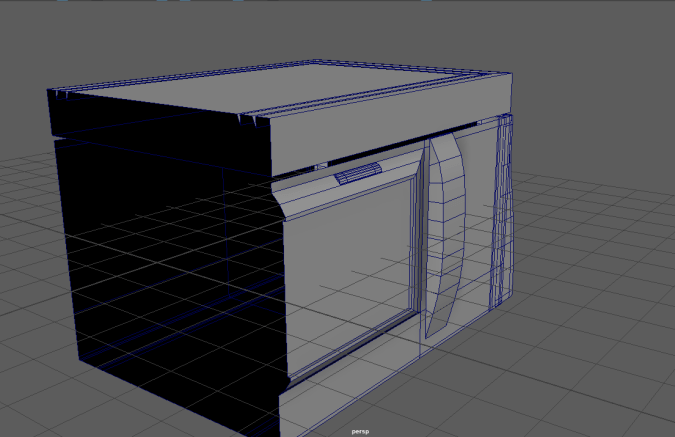
Here, you can see that my crate didn’t turn out the way I wanted to after I went in and mesh>smoothed it out. I got some shading errors, as you can see, and I have yet to fix them. They’re extremely prominent when I bring them into Substance Painter, and you’ll see that later on. I also made my ID crate for Painter, and that one turned out fine:

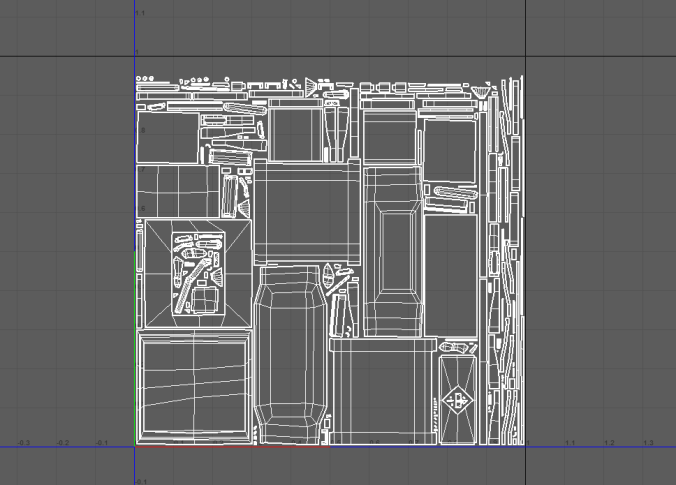
After getting all my crates, I went back into my low poly and UV’d it out. UVing is something I really struggle with and I’m still trying to figure it out, but here’s what my UVs look like so far:

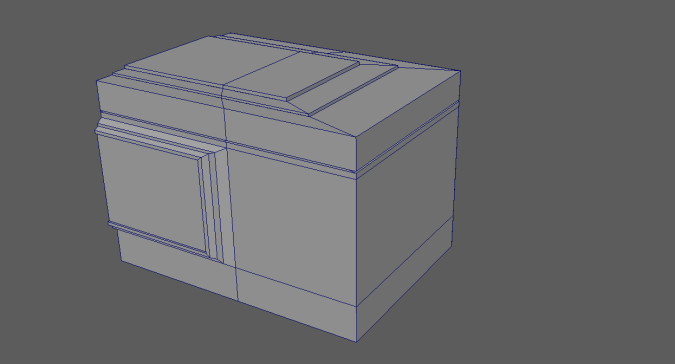
I’ll check with Frank and see if I can improve my UVs or if they look wrong, but once I fix my UV and shading errors, I think it will look much better for texturing in Painter. Here’s a good angle that I got of my Painter maps. It looks okay, but my shading errors and some bumps in my low poly are showing through. I still have to go through and fix everything, but I’m nearly there.
Blog Post Week 3:
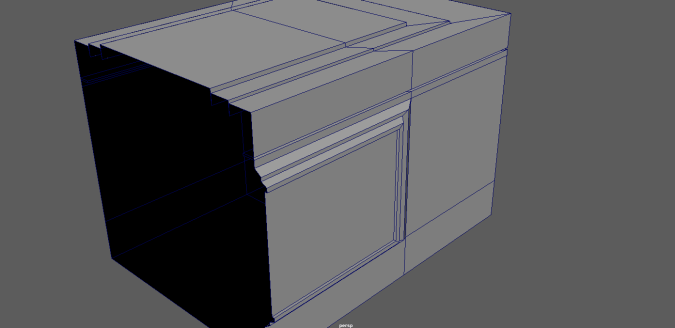
Again I’m disappointed with my lack of progress, but this week my workload for other classes should be light so I’ll be able to crunch down and finish this assignment. Referring to the previous post in week 2, I’ve gotten to modeling the piece from Black Mirror:
Here’s the piece:
It’s been beveled out and I think I like how it looks. I’m still deciding whether to merge the vertices at the top to a closer point of the box, but here’s what I have on the box so far:

I couldn’t figure out how to get it to go in at an angle properly, so I put it perpendicular and I like how it looks. I still need to get into the minutia and details of the crate, but I have a general idea of where I’m headed. I deleted the top section and created a new object for it:
Here’s my crate so far, all n-gons have been fixed up until this point:
This is what the crate looks like mirrored; I’m finding that it’s still a bit wide so I’ll have to modify the size, but I’m happy with everything in my model so far. For the next few days, I’m crunching down on details and polishing my model. Since I have no n-gons so far, I’m going to keep cleaning as I go and make the final cleanup as easy as possible.

It looks too much like a microwave right now, funnily enough. I’m hoping the final product will look much better.
I also added some attachments to the side of my crate, beveled out and all tris/n-gons taken care of!


Blog Post Week 2:
I haven’t made a lot of progress, but I hope with the free time I have this week that I’ll make a lot more progress. The corners are the hardest part, I plan on using the background structures in the following image to shape out the side corners of the box.
My main model is pretty crude and simple. I might have to scrap some pieces of it if I don’t like where the model is headed, but so far the general shape is what I’m heading for. Here’s a reference of the general crate I’m going for, just as a reminder:

I still haven’t beveled anything and it looks pretty bad smoothed out, I just have the general shape and a general idea of the direction I want to continue in.
I split the model in half and I’ll probably mirror it over.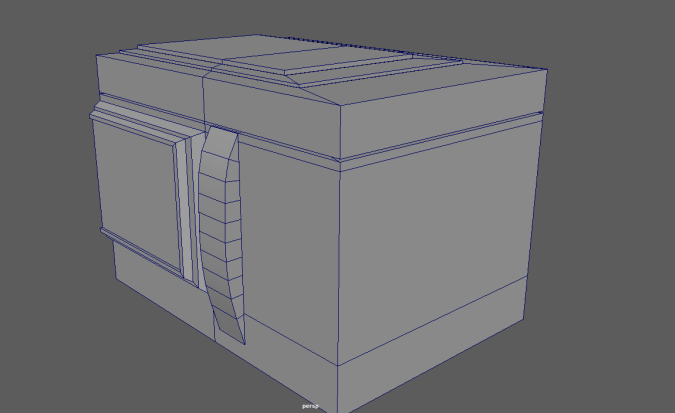
I modeled a crude portion of the buckles on the front and I plan on detailing a bit down the road.
Blog Post Week 1:
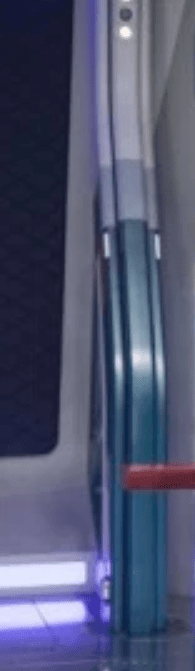
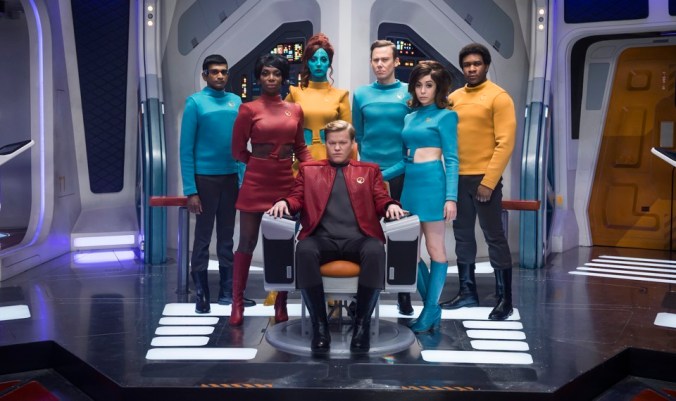
For my Sci-Fi Crate, I wanted to do something based around an episode of my favorite TV series: Black Mirror. It’s a little difficult to conceptualize and put in words what specifically I’d like to create. The episode I believe is most doable (and also has a little bit of character flair) is Season 4, Episode 1: USS Calister. This episode is very sci-fi and Star Trek-esque episode with lots of futuristic tech and bright white, angles environments.
I’ll be using white colors for most of the crate to emulate the environment of the ship.
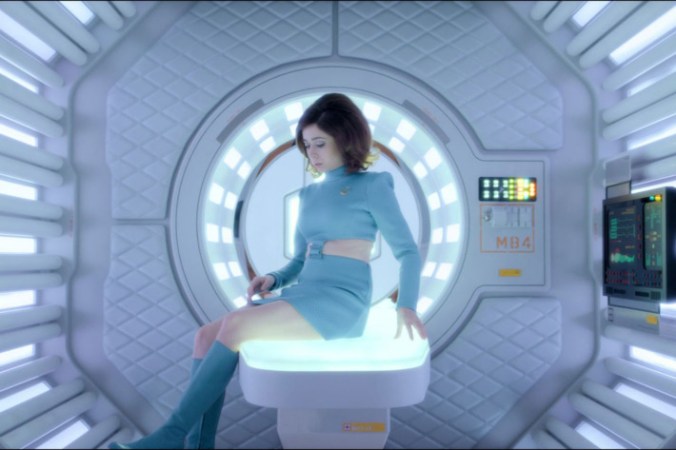
I also like the blue/white glow of the environment around the ship, and I’d like to emulate that in the crate. The overall shape will be this crate:
A rectangular shape is something I think suits the overall design. I think this design is nice, but I’d like harder edges/angles:
Overall, this final image is probably going to be a little more doable, and is something I’m going to shoot for:
This crate is similar to the last one, but the angles are closer to what I want. Of course the color scheme will change, but this is probably the crate that I’m going to emulate:
